Easy Landscaping Projects
It’s your yard — yours to do with as you wish. And while that is great, that does not mean you have to be one of those people who spends every spare moment in their yard, sprucing the landscape up.
But, still, if your landscaping could use a little something to jazz it up. It doesn’t have to be hard and can be really easy. If that is the case, No problem says Clark Nigg the Head Designer at Landscape Pros in Manassas, VA.
Here are five totally doable projects that are easy, and your budget will barely notice, but your neighbors definitely will:
#1 Add Some New (Tough) Edging
Tell your grass who’s boss with some mean edging that can stand up to even the crabbiest of all crabgrasses and not some flimsy edging that will need to be replaced.
Especially, don’t make the mistake that many homeowners make by buying the cheap flexible plastic junk, thinking it will be easier to install. In the end, it will look cheap and amateurish from day one and in a month or two you will be ripping it out.
Worse, cheap stuff won’t last. And before you know it, you will not be able to tell where your garden bed ends, and where your “lawn” begins.
Instead, it is recommended by the “Pros” at Landscape Pros to invest in professional grade steel edging.
Metal edging works hard without calling much attention to itself after installation. Steel edging offers many benefits:
- Creates a clean separation between garden beds, grass, paths, and driveways using little space and minimizing visual distraction.
- Prevents migration of garden materials such as gravel and mulch.
- Particularly effective at keeping grass from creeping into adjacent beds and paths.
- Will not rot, crack, chip, or become brittle in cold weather.
- Stays put, resisting ground movement most often created from extreme weather conditions such as excessive rains or frost heave.
- Won’t sustain damage from garden maintenance tools.
Note: Steel edging is preferred and costs a little more, however rigid fiberglass, and aluminum are other options.
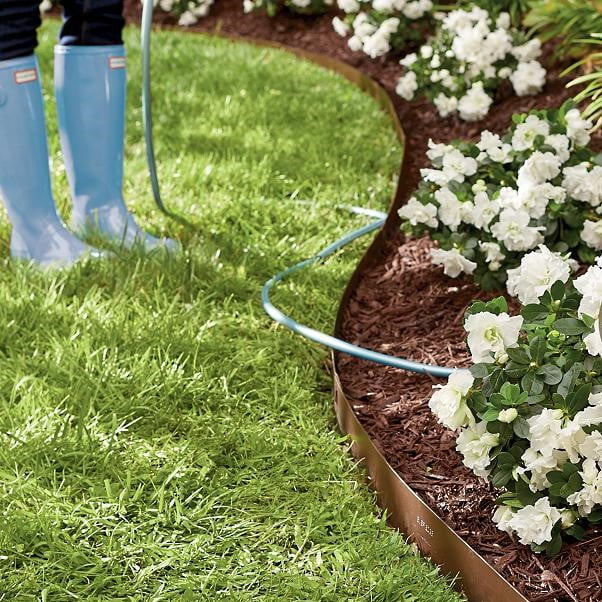
Shown: Classic Everedge Lawn Edging, 5″ tall, Set of 5: 16′ length approx. $149.00
Tips on installing edging:
1 Lay a garden hose in the pattern or along the line where the edging will go. Use spray paint or sprinkle flour or powdered chalk to mark the hose pattern. Mark where the edging will start and stop on the garden hose or ground. Measure between the marks to determine how much edging to use.
2 Make a narrow trench where the edging will go using a lawn edger or sharp spade. Push the edger/spade into the soil about 6 inches, wiggle it back and forth a couple of times and pull it out. Do not leave any part of the edge uncut.
3 Push the edging into the trench. As you go, place stakes in the stake pockets and push them in just far enough to hold the edging upright. Hand form the curves. Overlap the ends and use stakes to connect the pieces.
4 Score the edging lightly along one side with a hacksaw, then make a 1-inch cut from the bottom up to make sharp corners. Hold the two-by-four board down while lifting the other side of the edging to bend the corner.
5 Cut off the end of the edging by scoring then bending it back and forth until it breaks.
6 Pound all the stakes into the ground with a heavy hammer or small sledgehammer until the stakes are flush with the top of the edging and the edging is sticking up about 1 1/2 inches above ground level.
The cost? Mostly your time, edging prices range $2.50 and up a square foot.
For more tips on landscape edging and more easy landscaping projects contact Landscape Pros in Manassas, VA.
#2 Create a Focal Point with a Berm

A berm is a mound of gently sloping earth, often created to help with drainage. You can also build them to create “island beds,” a focal point of textures and colors, plants, rocks, and trees that are so much more interesting than plain green grass on your landscape.
On average, a berm should be about four to five times as long as it is high, gradually trailing out into the remaining landscape. Most berms are no higher than 18-24 inches (46-61 cm.). The berm design can be created with more than one peak for additional interest as well and shaped to perform its purpose.
Plus, berms can serve to provide you some privacy — they help with diffusing street noises. What is not to like about that? Especially if you live in more urban areas.
For most yards however, berms should max out at 2-feet high because of the space needed to properly build one.
They need a ratio of 4-6 feet of width for every foot of height. That is at least 8 feet for a typical 2-foot high berm. So be sure you have the room or decrease the height of your berm.

Popular berm plantings include:
- Flowering bushes, such as azaleas
- Evergreens, such as blue spruce Perennials such as periwinkle
- Tall, swaying prairie grasses
- Lots of mulch to keep weeds away
You can save on topsoil costs a whole lot if you buy in bulk — approx. $50 / cubic yard vs. almost $70 for the same amount in bags from a big-box store. Even with a delivery fee, you’ll come out ahead.
The cost? Usually less than $300, depending on how big you make it, how much soil you need to buy to get to your desired height, and what plants you choose for the berm.
Here are a few berm ideas. Contact Landscape Pros @ 571-535-8622 for more suggestions on designing and installation of your berm project. Our experts have lots of ideas for other easy landscaping projects.


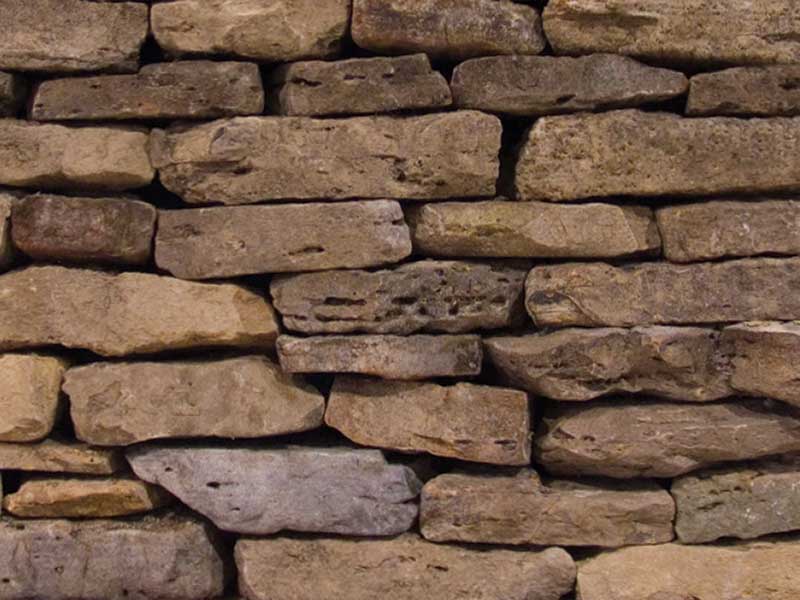
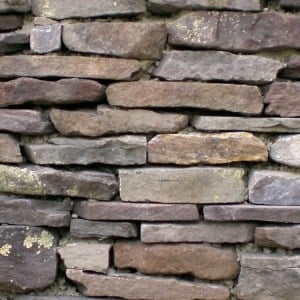
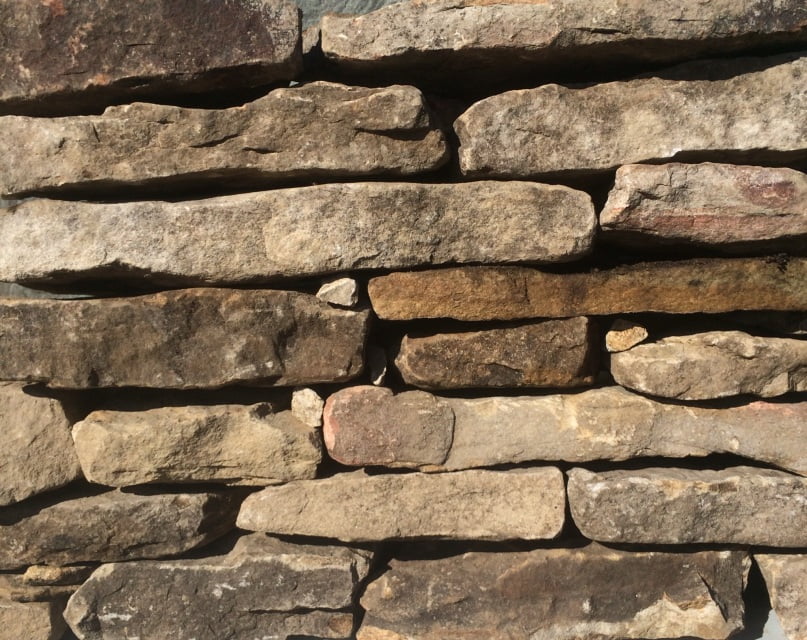
#3 Make a Small Flagstone Wall or Walkway
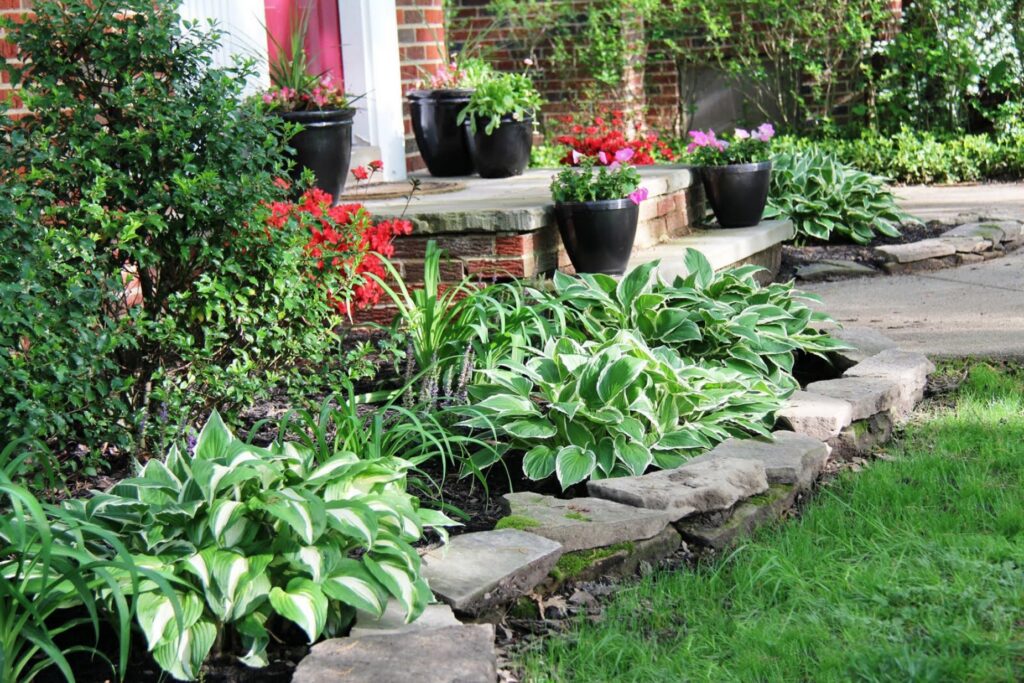
Aim to build a small boarder wall no more than 12 inches tall, and it becomes a super simple DIY project — requiring no mortar at all! Walkways with Flagstone can be easy and creative too and are only limited by your imagination.
How to build an easy flagstone wall:
- Dig a trench the width desired to cut through the grass sod and roots using a flat-blade shovel or edger.
- Dig and remove dirt 3 to 4 inches deep to remove grass and wide enough to accommodate the flagstones for border.
- Fill with pea gravel and/or sand and tamp to make the area level.
- Lay out the flagstones to see their shapes and sizes and arrange them to your liking.
- Stack the smaller stones first.
- Saving the largest, prettiest flagstones for the top layer of the 12-inch wall.
- Backfill with desired pea gravel.
Flagstone is usually a form of a sandstone composed of feldspar and quartz and is arenaceous in grain size (0.16 mm – 2 mm in diameter). The material that binds flagstone is usually composed of silica, calcite, or iron oxide.
When choosing the flagstone try to select stone of consistent thickness.
The cost? About $300 for stones and sand (a ton of 2-inch-thick stone is enough for a wall 10 feet long and 12 inches high).


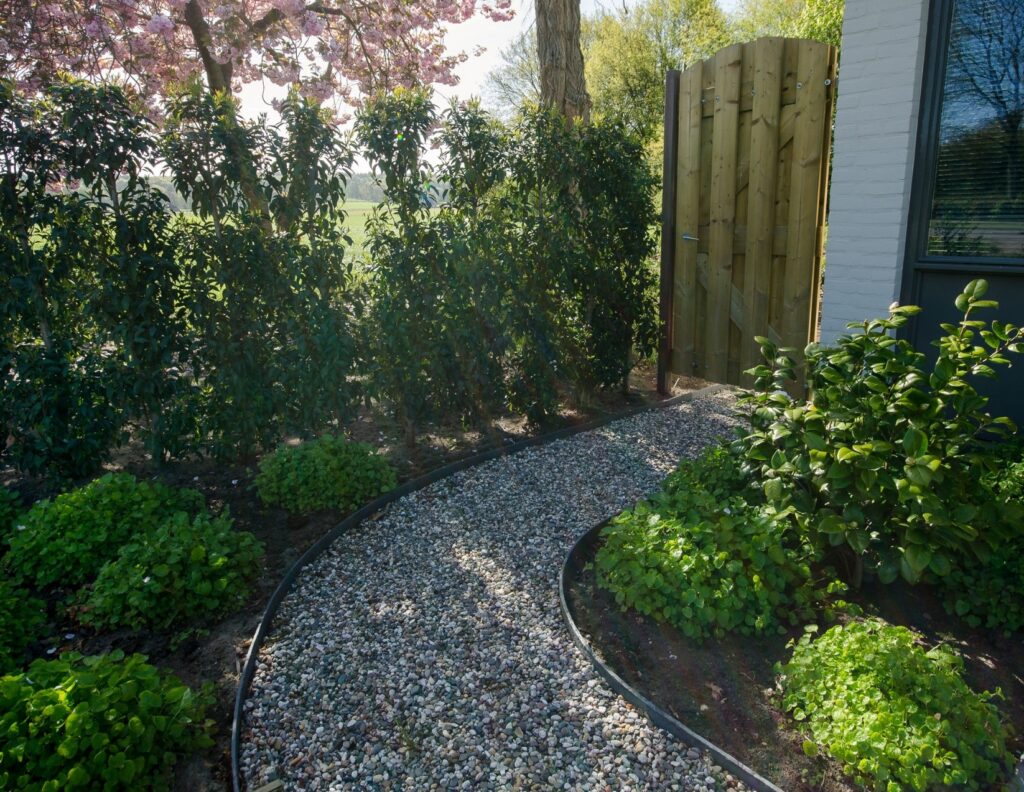
#4 Install a Path with Flagstone or Gravel
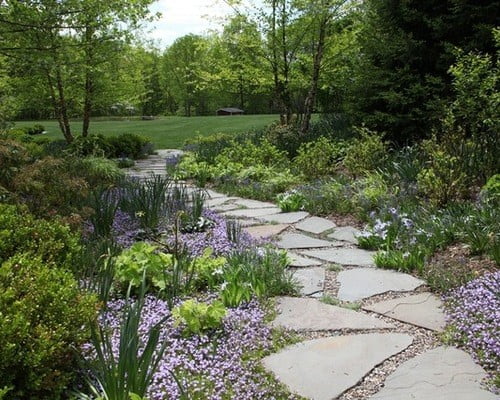
There’s something romantic, charming, and simply welcoming about a meandering pathway to your front door or backyard garden — which means it has super-huge impact when it comes to your home’s curb appeal.
You can use flagstone, pea gravel, decomposed or crushed granite, even poured concrete (although that is not easy to DIY).
A few tips for building a pathway:
- Allow 3 feet or more in width for clearance.
- Create curves rather than straight lines for a pleasing effect.
- Remove sod at least 3 to 4 inches deep to keep grass from coming back.
- If you live in an area with heavy rains, opt for large, heavy stones.
The cost? Anywhere from a couple of hundred bucks to upwards of $500 depending on the material you use, with decomposed granite being the least expensive, and flagstone (also the easiest of the bunch to install) being the most expensive.
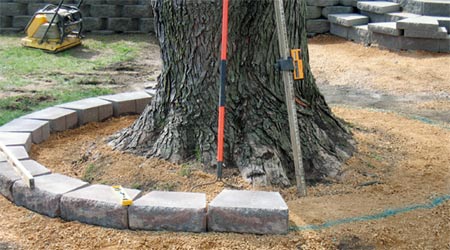
#5 Build a Tree Surround
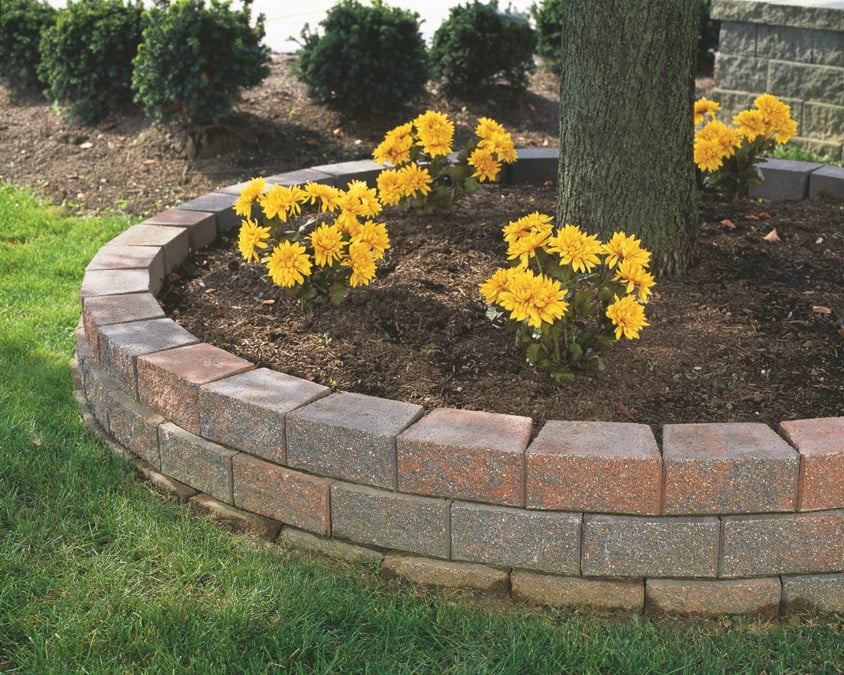
In addition to being an attractive design element, a tree surround (tree-ring) border encircling a tree is practical in several ways. It protects the tree trunk from contact with lawn mowers, and it corrals mulch from spreading to the lawn. Plus, it adds a decorative element to the landscape. Depending on the height of the border and the material used, a tree ring can provide a pleasant seating area, as well.
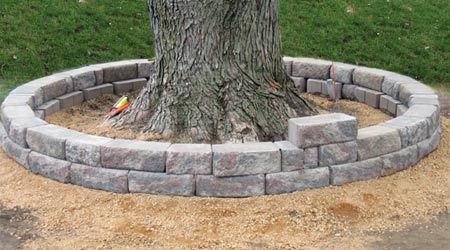
Installing a stone masonry “surround” for a tree is an amazingly easy project: It looks great, and it means you’ve got less grass to mow around your trees.
All it takes is digging a circular trench, adding some sand, and installing brick, cement blocks, or stone. Just go for whatever look you like best for the surround.
The trickiest part is getting a perfect circle around the tree. Here’s how:
- Tie a rope around the tree, making a loop big enough so that when you pull it taut against the tree, the outer edge of the loop is right where you want the surround to be.
- Set your spade inside the loop with the handle plumb — straight up and down. Now, as you move around the tree, the loop of rope keeps the spade the same distance from the base of the tree, creating a nice circle.
How to build the tree surround:
- Dig out a circular trench about 8 inches deep and 6 inches wide.
- Add a layer of sand or gravel 2-3 inches and tamp it down flat and level.
- Place the first row of bricks or stone in the trench and use a level to check and make sure each brick or stone is level. You may made need to wiggle the brick or stone a bit or add/remove a bit of sand underneath the brick/stone if you need to adjust the height to make it level. Set bricks at an angle for a saw-tooth effect or lay them end-to-end.
- Lay the base course of block. At least half of the first block should be below the finished grade to prevent shifting.
- Backfill and front-fill the trench with gravel and tamp to compress the gravel.
- For subsequent courses of block, use blocks that are faced on the front and back, so it is attractive from the inside, as well. Apply a bead of construction adhesive between the layers.
- You can add a thin layer of topsoil for planting flowers inside the ring, but no more than a top dressing – so the tree roots can still breathe.
- Keep in mind that additional vegetation will compete with the tree for moisture and nutrients, so feed and water accordingly. Mulch is best; a 2 to 3-inch layer helps to retain moisture and block weed growth. Remember to not cover the base of the trunk.
The cost? Moderate cost. Big box stores like Home Depot sell pavestone tree ring kits for around $340 cheap. You can do it for less with cheaper commonly-available pavers and stones.

Landscape Pros in Manassas, VA hopes you like these easy landscaping projects? Give us a call @ 571-535-8622 our expert designers and installation “Pros” can answer your questions and help design, build and install all your landscaping needs. We have ideas for hundreds of easy landscaping projects.